
How to Remove a Paintball Tank Under Pressure Safely
Learning how to remove a paintball tank under pressure correctly prevents O-ring blowouts, ASA thread damage, leaks, and dangerous pressure release accidents. This complete guide explains the safest methods for both HPA and CO2 systems.
If you want to remove a paintball tank under pressure safely, you should never simply twist the tank off immediately after a game. Many players damage their O-rings and ASA threads because they do not understand how pressure remains trapped inside the marker body after firing. Learning the correct way to remove a paintball tank under pressure takes less than 30 seconds and can save you from expensive repairs later.
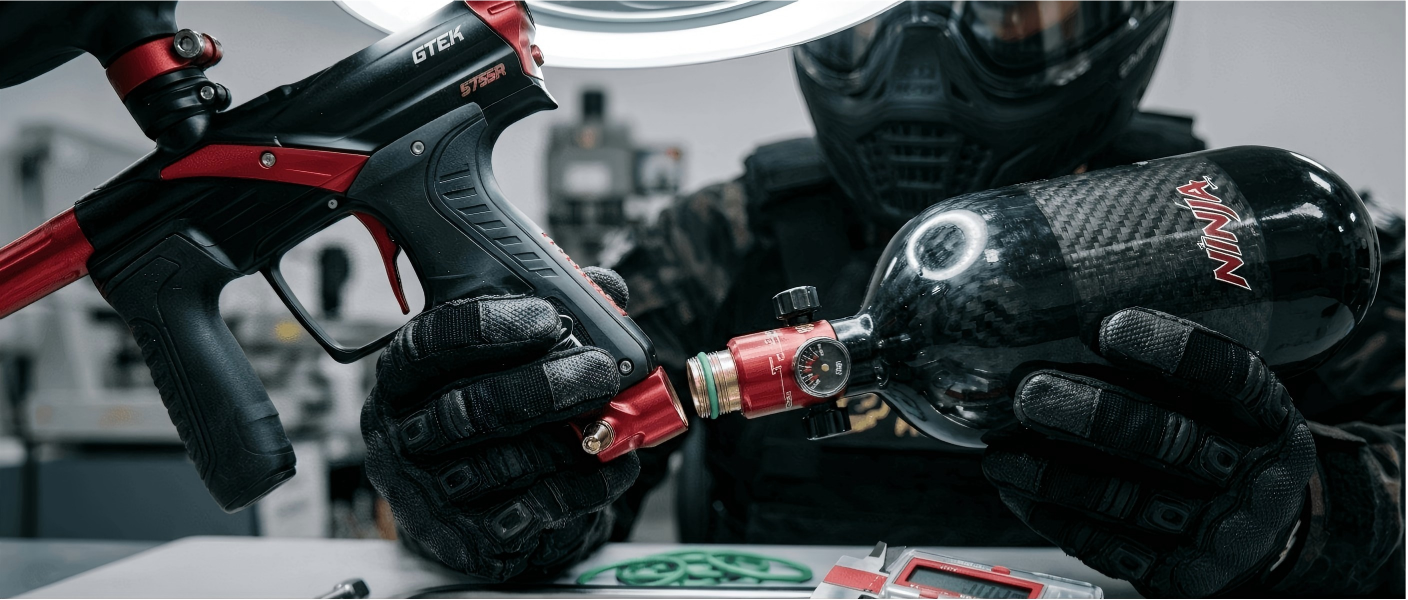
HPA paintball tanks store compressed air at up to 4,500 PSI. Improperly trying to remove a paintball tank under pressure can eject the tank O-ring, damage ASA threads, or create sudden pressure release hazards.
Table of Contents
Why Pressure Matters During Tank Removal
To safely remove a paintball tank under pressure, you first need to understand where the pressure exists inside the marker. Even after you stop shooting, regulated air remains trapped between the tank regulator, ASA, and firing chamber.
When players attempt to remove a paintball tank under pressure too quickly, that trapped air rushes through the opening threads and pushes directly against the tank O-ring. This sudden pressure differential is the leading cause of paintball tank leaks and O-ring failures.

How to Remove a Paintball Tank Under Pressure Using the Dry-Fire Method
The dry-fire depressurization technique is the most common and safest way to remove a paintball tank under pressure if your marker does not have an On/Off ASA.
- Point the marker in a safe direction. Always treat the marker as if it could still fire.
- Dry-fire the marker 3–5 times. This vents the remaining regulated air inside the marker body.
- Listen carefully. When the firing sound becomes very weak or silent, the marker is mostly depressurized.
- Slowly begin to unscrew the tank. A brief hiss lasting 1–2 seconds is normal. A long hiss means the marker still contains pressure.
- Completely remove the tank smoothly. Never yank or rapidly twist the tank free.
- Install a dust cap immediately. This protects the tank O-ring from dirt and UV damage.
Experienced players can often determine whether it is safe to remove a paintball tank under pressure simply by listening to the sound of the dry-fire discharge.
How to Remove a Paintball Tank Under Pressure with an On/Off ASA
An On/Off ASA is the safest upgrade for players who frequently remove a paintball tank under pressure. The ASA valve blocks airflow from the tank before removal begins.
- Turn the On/Off ASA to OFF. This isolates the marker body from the tank.
- Dry-fire several times. This clears the remaining air trapped inside the marker.
- Confirm the marker is silent. No discharge sound means the body is depressurized.
- Unscrew the tank slowly. A properly depressurized setup should remove almost silently.
Players who regularly remove paintball tanks under pressure should strongly consider installing an On/Off ASA because it dramatically reduces O-ring wear.
Emergency Tank Removal Procedure
Sometimes a marker jams and cannot dry-fire properly. In this situation, you must still remove the paintball tank under pressure carefully and slowly.
- Check whether your marker has an On/Off ASA and turn it OFF.
- Look for a regulator bleed screw or velocity adjustment bleed feature.
- If neither exists, slowly loosen the tank one-eighth turn at a time. Pause several seconds between movements.
- Allow trapped air to bleed gradually before fully removing the tank.
Using pliers or strap wrenches can permanently damage the ASA or tank threads.
CO2 Tank Removal Safety
CO2 systems behave differently from HPA systems. Temperature changes dramatically affect CO2 pressure, making it even more important to correctly remove a paintball tank under pressure.
A hot CO2 tank can exceed 1,200 PSI during summer conditions. Always keep the marker level while removing a CO2 tank to avoid liquid CO2 entering the ASA connection.

| Tank Type | Typical Pressure | Removal Risk |
|---|---|---|
| HPA Tank | 450–850 PSI regulated output | Predictable and stable |
| CO2 Tank | 500–1,200+ PSI temperature dependent | Pressure spikes and freeze effects |
Common Mistakes When Removing a Paintball Tank Under Pressure
The following mistakes are responsible for most paintball tank leaks and ASA damage:
| Mistake | Result |
|---|---|
| Unscrewing immediately after play | O-ring blowout |
| Removing the tank too quickly | Thread damage |
| Ignoring a long hiss | Pressure spike at ASA connection |
| Leaving the tank uncapped | Dirt contamination and O-ring wear |
| Using tools to force removal | Cracked ASA or damaged tank neck |
Frequently Asked Questions
Can you remove a paintball tank while it still has pressure?
Yes. The tank itself can remain pressurized, but the marker body must be depressurized before you remove the tank.
Why does my paintball tank hiss during removal?
A short hiss is normal. A long hiss means there is still trapped air inside the marker body.
What happens if I remove a paintball tank under pressure too quickly?
You can damage the O-ring, strip ASA threads, or create a sudden pressure release event.
Does removing the tank empty the tank pressure?
No. The tank valve seals automatically once disconnected from the marker.
Additional Paintball Resources
- ASTM Paintball Safety Standards
- Paintball Players Organization
- HK Army Paintball Equipment
- Planet Eclipse Marker Manuals
If you regularly remove a paintball tank under pressure, developing a consistent depressurization routine is one of the best ways to protect your marker, extend O-ring life, and improve overall field safety.